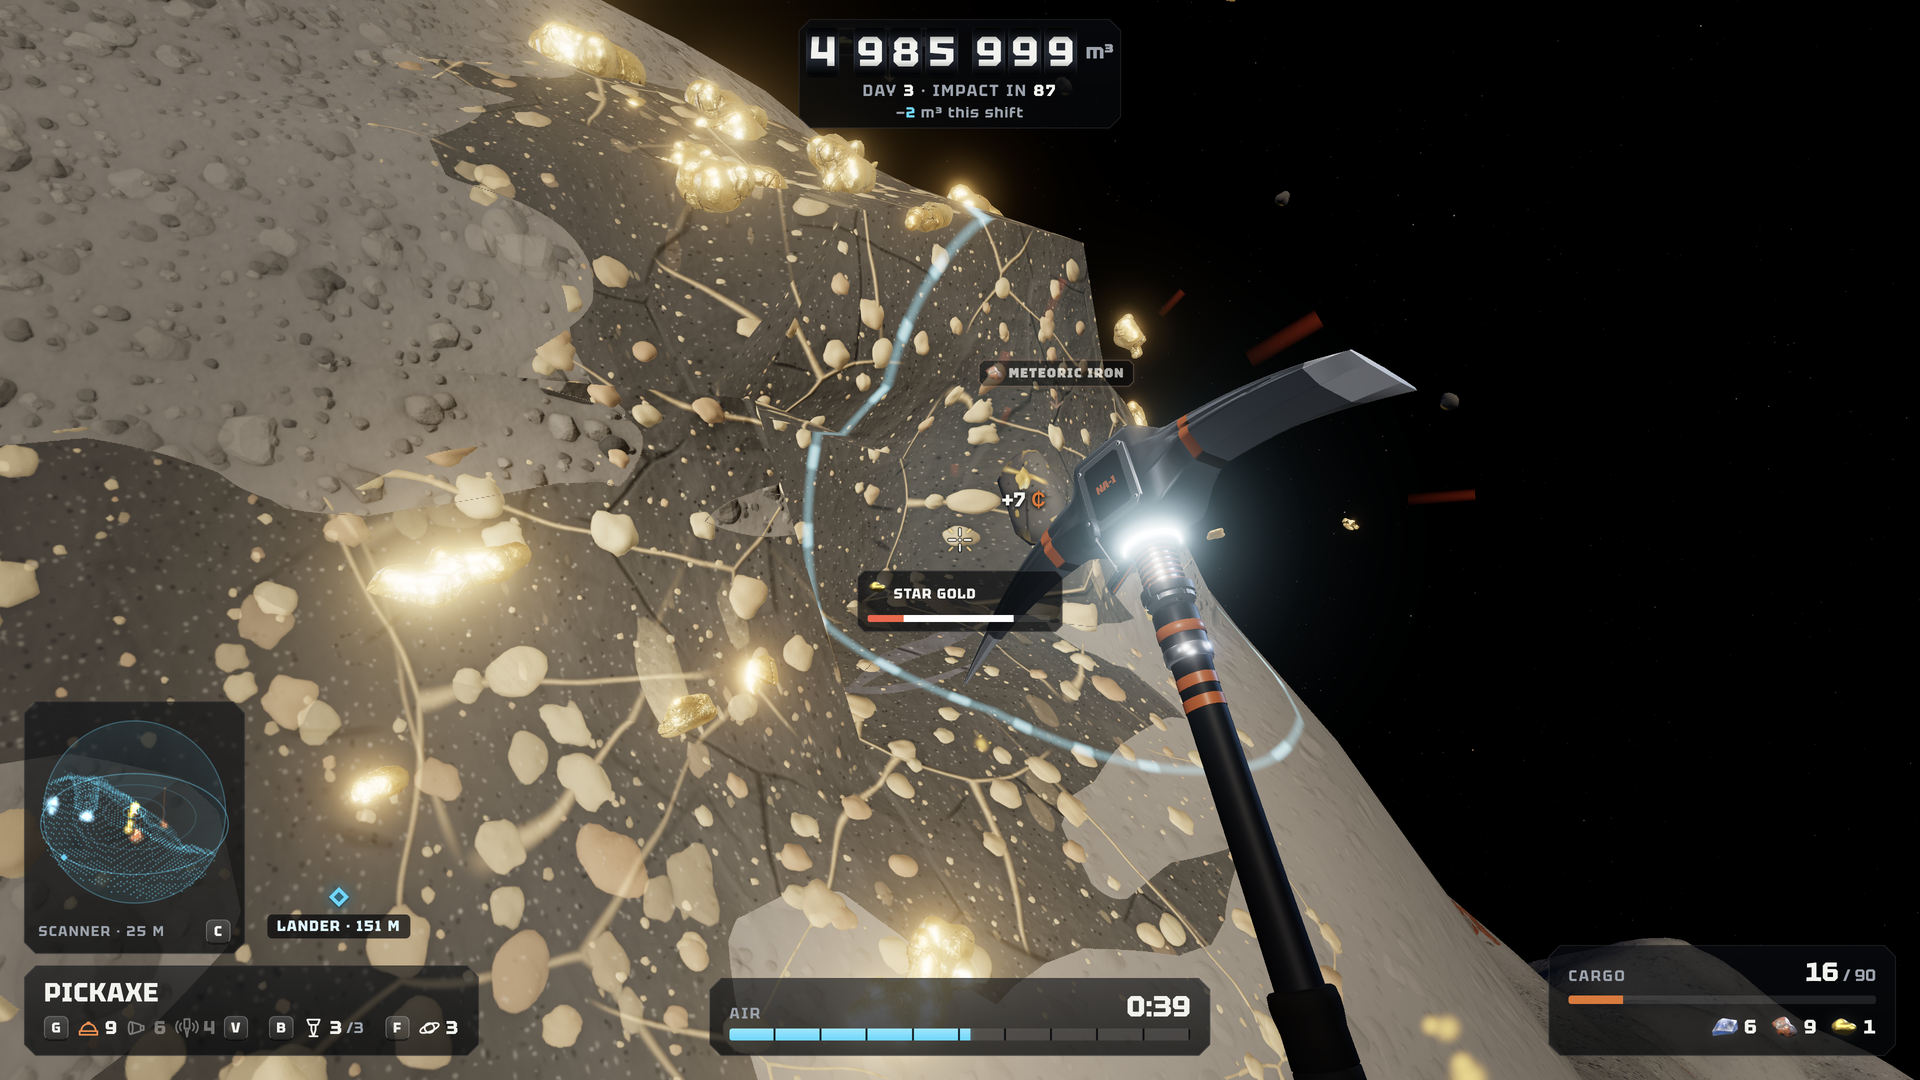
The No Asteroids HUD is split into five readout groups: the contract and the shift at the top centre, the scanner, lander and tool panel at the bottom left, the AIR and JETPACK bars at the bottom centre, and the cargo readout at the bottom right.
Top centre: the contract and the shift
One frame in the demo build reads 4 985 999 m3 for the volume still to be mined, DAY 9 - IMPACT IN 87 for the day counter and the impact countdown, and 24 m3 this shift for what you have dug this descent. The three numbers together tell you whether you are ahead of the impact date or already behind it.
Bottom left: scanner, lander and your tool
SCANNER - 25 M— the range the scanner is covering.LANDER - 151 M— your current distance from the lander.- The tool panel, with the active tool and its hotbar slots.
The lander distance is the one to watch late in a shift: it is the number that tells you whether the walk back still fits in the air you have left.
The scanner readout is the start of that chain: how the mineral scanner works.
Bottom centre: air and jetpack
The AIR bar carries a countdown timer, and one frame in the demo build reads 0:39, so it is the descent clock. The JETPACK bar sits beside it and runs on the pack's own reserve, so the two budgets are separate.
The bar that ends your shift is the one you extend with upgrades: air supply.
Bottom right: cargo
The cargo readout shows the current load against the maximum, CARGO 16/40 on a fresh save, and the number on the right tells you when to stop digging and start walking.
Upgrading the hold is what raises that maximum: cargo capacity.
Labels on the rock itself
The scanner tags the ore you are looking at with floating labels such as METEORITE IRON and STAR GOLD. In co-op there is one more world label: a LANDING n counter over the dig site showing how many crew members are still on the surface.